How to install Processing 3.5.4 on Ubuntu 20.04 LTS Focal Fossa
Note: This tutorial was made in support of The Processing Foundation's Processing Community Hangout held May 9 2020 and is an expansion of the presentation I gave as a part of that event.
It was back in 2016 that I created Installing Processing 3.x on Ubuntu Linux Systems Tutorial in which I outlined installing Processing 3.0.2 on my laptop, which was running Ubuntu 15.10. Since then I've undergone several Ubuntu OS updates (with mixed degrees of success) and several forced reinstalls of the OS as well as some kludgy work arounds to deal with shortcomings in Ubuntu's ability to play nice with my hardware. While theoretically I should have been able to update my OS from one version to the next, it rarely worked in a clean fashion, if at all. Consequently, I've been hobbling along with Ubuntu 17.10 for some time.
With the release of Ubuntu 20.04 LTS (Focal Fossa) in April 2020, I decided to perform a clean install of Ubuntu on my laptop, to which minimal changes were made prior to installing Processing. Therefore, the steps provided in this tutorial should work on any system with a clean install of Ubuntu 20.04.
Tutorial Assumptions
The first assumption is that you have successfully installed Ubuntu 20.04 LTS (Long Term Support). In particular, my installation used the 64-bit PC (AMD64) desktop image. In case you have not yet installed Ubuntu 20.04, head over to
https://ubuntu.com/download/desktop
and get Ubuntu installed before continuing with this tutorial. If you used Ubuntu's update feature to add 20.04 on top of the version of Ubuntu you were previously using, I can not guarantee that the following instructions will work. Additionally, the only software used during the installation process are programs that are a part of the standard Ubuntu install. In addition to the browser, the programs used are gedit (text editor) and Nautilus (file manager). You should also have some basic familiarity with simple Linux commands and the CLI (Command Line Interface).
In the instructions that follow, Linux commands that are entered at the terminal command prompt are shown in bold green with one command per line.
Before beginning the install process, you may want to read the general information Processing provides about installing Processing on Linux systems - Processing Supported Platforms document - but be forewarned: the instructions provided there are for Ubuntu 14.04 and Processing 3.2.1.
Part 1: Installing Processing 3.5.4
Step 01: With your browser, go to https://processing.org/download/ which is where we will download Processing from.
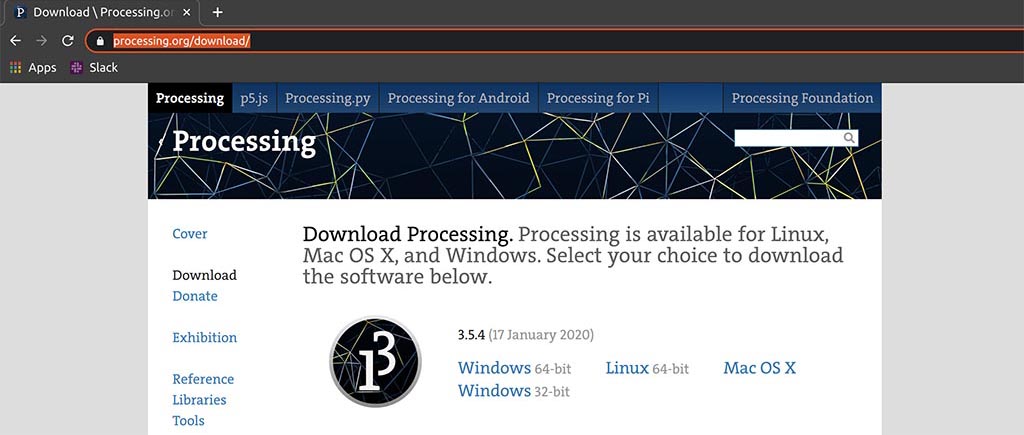
Step 02: Click the link to download the Linux 64 bit version of Processing. The version I downloaded was 3.5.4 (17 January 2020) - Linux 64-bit (file name processing-3.5.4-linux64.tgz)
Step 03: While we are here, something else we're going to do is to right click the round Processing logo and select the browser's Save Image As option to save a copy of the image to our computer. The image's filename is processing3-logo.png and it will, by default, be saved to the same directory as we just downloaded the Processing file to.
Step 04: Open a Terminal and navigate to the directory to which you downloaded the two files. This should be your Downloads folder. You may want to confirm that the two files you just downloaded are in the directory by using the ls command.
cd Downloads
ls

Step 05: Before unzipping the Processing archive file, think about where you want to have Processing installed on your system. I am choosing to install Processing in the /usr/share/ directory. For more information about the Linux directory structure, you may want to read Filesystem Hierarchy Standard on Wikipedia. You are free to install Processing to some other directory but you will have to adjust the instructions that follow accordingly.
Step 06: Having decided on where to install Processing, we will need to create the directory where the contents of the tgz will be unzipped to. I want this directory to be named processing so will use the following command to create the directory:
sudo mkdir /usr/share/processing
Step 07: Now that we have created the target directory, it's time to unzip the contents of the Processing tgz file to that directory, which is done with the following command:
sudo tar -xvf processing-3.5.4-linux64.tgz -C /usr/share/processing
where
- -x means extract the files
- -v means to list to the console what's being extracted
- -f means to process the filename that follows as the archive
- -C means that the path that follows is where you want the files to be extracted to
The result of this command is to place all the files in the directory /usr/share/processing/processing-3.5.4 with processing-3.5.4 being the top level directory name in the tgz file.
Step 08: While we are at it, lets copy the Processing logo image file as well using the following command:
cp processing3-logo.png /usr/share/processing/processing-3.5.4
Step 09: Let's look and see what we've done by going to the processing directory and listing its contents:
cd /usr/share/processing
ls
We see that the directory contains a single entry. The entry will be the directory processing-3.5.4 which is good since this means we can add other versions of Processing in the future without disturbing this version.
Step 10: Let's take a look at the directory where the Processing files were unzipped to and see what is in that directory:
cd processing-3.5.4
ls -l
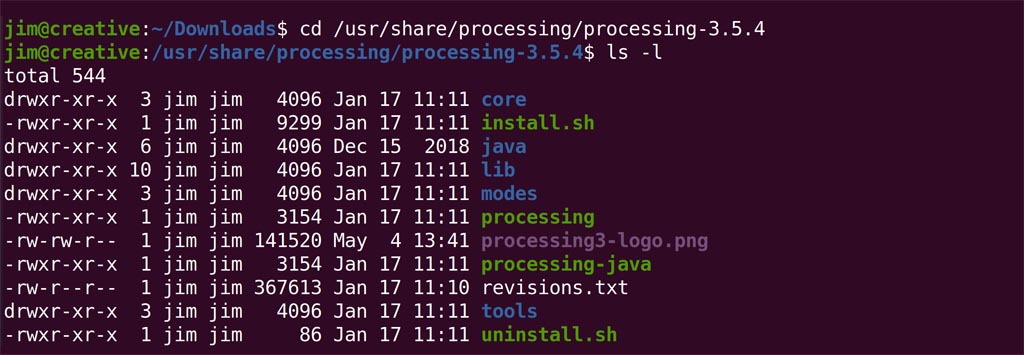
Step 11: As you can see there is an executable file in this directory named processing. Let's see if it will run by entering the command that follows. Before pressing the enter key to execute the command, copy the command to your clipboard as you will need it later.
/usr/share/processing/processing-3.5.4/processing
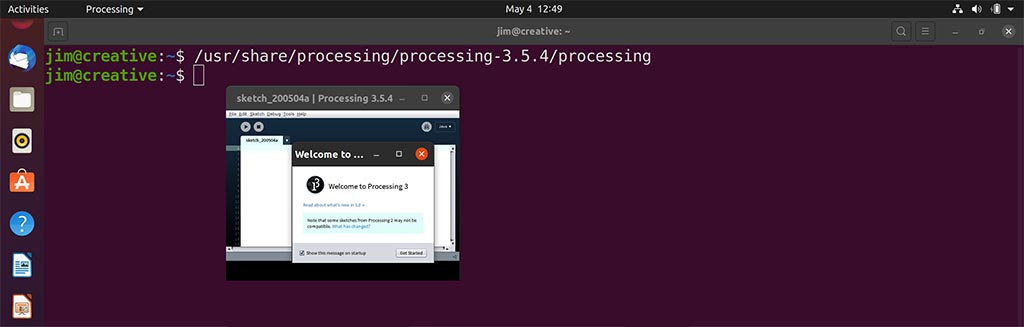
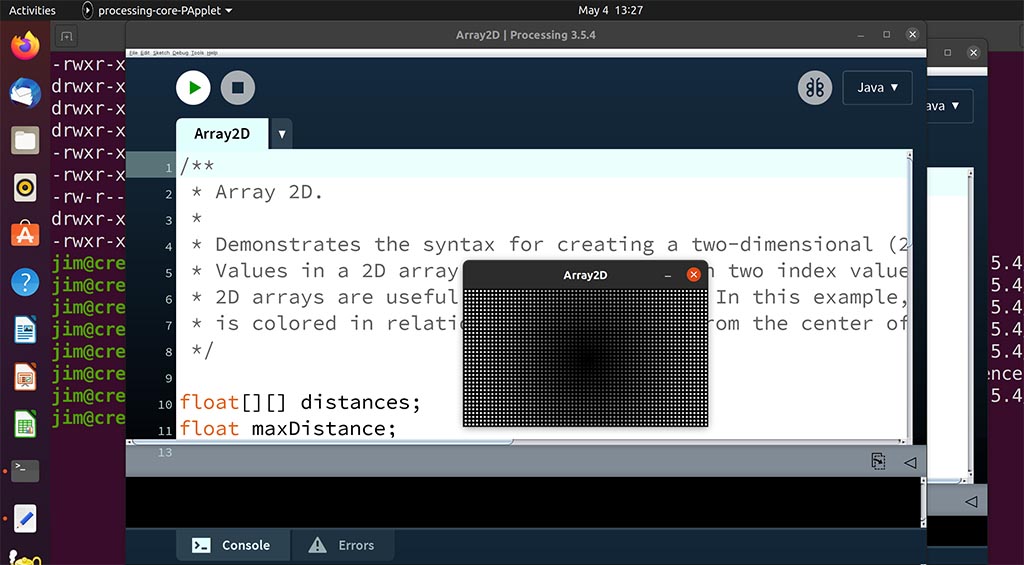
Step 12: On my system, Processing opens as shown in Figure 4 above. Everything looks good so far - except for the fact that I need a 40x power magnifying glass to read the text. Click the red x in the upper right corner of the Welcome to... window to close that window.
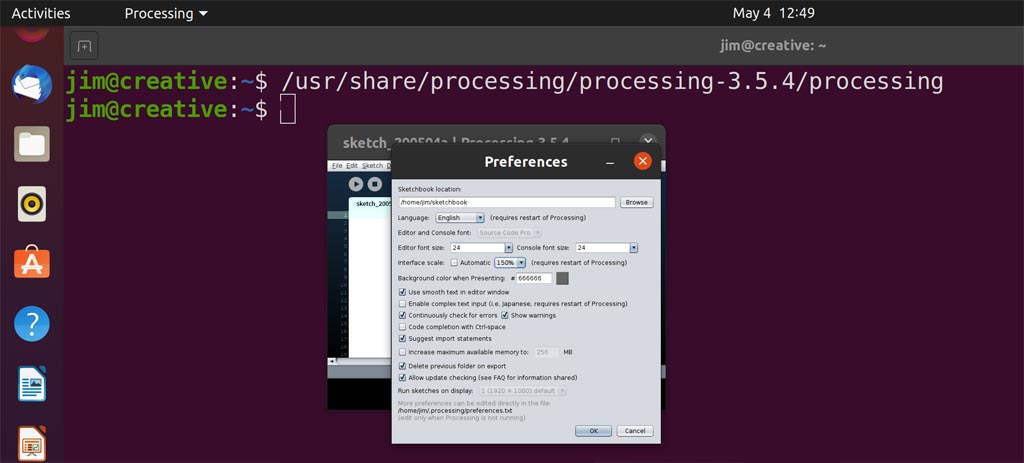
Step 13: In the Processing IDE, click the File menu option, then click the Preferences option in the dropdown list. Take this moment to note the location of the Processing preferences file (on my system it is/home/Jim/.processing/preferences.txt. Also note the default location for where your sketches (pde files) will be stored. You may want to take this opportunity to increase the editor and console font sizes as well as changing the interface scale if your Processing IDE is as small as mine.
Step 14: Go ahead and close Processing. Note that back in the terminal you may see the following message, which can be ignored:
INFO: Created user preferences directory
Step 15: Use the up arrow key to retrieve the previous command we used to start Processing and press the enter key to restart Processing. To confirm that everything is working, I advise testing to see if Processing will run sketches. The quickest way to do this is to run several of the example sketches that come with Processing. These sketches are accessed via File -> Examples.
Step 16: Mission Accomplished. Congratulations.
On my system, Processing appears to have installed correctly and is working fine - other than the annoyingly small toolbar. That and the fact that I have to open a terminal and manually issue a command to start Processing. Rather than having to start Processing from the command line every time, I want to be able to start Processing from the desktop with a single mouse click. That we can't do at this point – which leads us to the second part of this tutorial: how to get a Processing launcher onto the desktop.
Part 2: Creating a desktop application launcher for Processing
Note that while Ubuntu 15.10 was using the Unity desktop (the subject of my original tutorial), Ubuntu 20.04 is using Gnome for the desktop. And because Gnome doesn't know about our Processing installation, we are going to have to manually create a desktop app launcher file ourselves.
Step 01: The file we are going to create will be named processing.desktop. Before creating that file we are going to need the following information:
- The application name. We'll name it Processing
- The command that will be used to start Processing (which we have from step 11 above): /usr/share/processing/processing-3.5.4/processing
- The location of the program icon we want to use: /usr/share/processing/processing-3.5.4/processing3-logo.png
Step 02: Now to create the processing.desktop file. We will use the gedit program to create the file. From the terminal enter the following command:
sudo gedit /usr/share/applications/processing.desktop
Step 03: Using gedit, create the following records in the file and then save the file.
[Desktop Entry]

Type=Application

Version=1.0

Name=Processing

GenericName=Processing

Comment=Processing 3.5.4

Icon=/usr/share/processing/processing-3.5.4/processing3-logo.png

TryExec=/usr/share/processing/processing-3.5.4/processing

Exec=/usr/share/processing/processing-3.5.4/processing
For information on the TryExec and Exec entries, check out What is the TryExec field in .desktop files on StackExchange.
Step 04: Make sure you saved the file. Now exit gedit. Note that when I save the file, I get a Tepl WARNING GVfs metadata is not supported message in the terminal. I'm going to ignore the warning.
Step 05: Now use the following command to open the Ubuntu File Manager program (whose actual name is Nautilus):
nautilus /usr/share/applications/
Step 06: In File Manager, aka Nautilus, find the entry for the processing.desktop file and select it. Right click on the file and select the Copy option. Note that you could have also selected the file and pressed Ctrl+C to copy the file.

Step 07: Position your mouse over an open area of the desktop (you may have to minimize Nautilus). Once over open ground, right click on the desktop and click Paste. You will now see a file icon for the processing.desktop file on your desktop with the text processing.desktop underneath it.
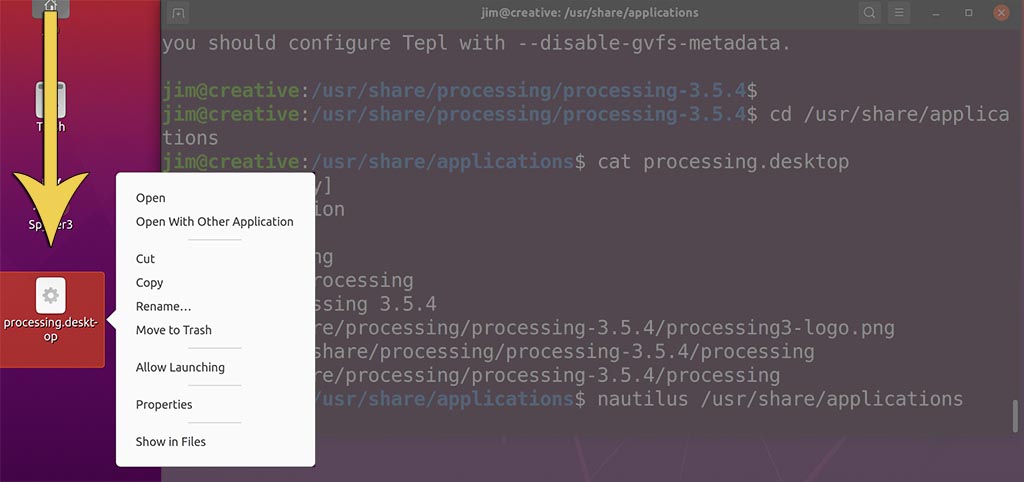
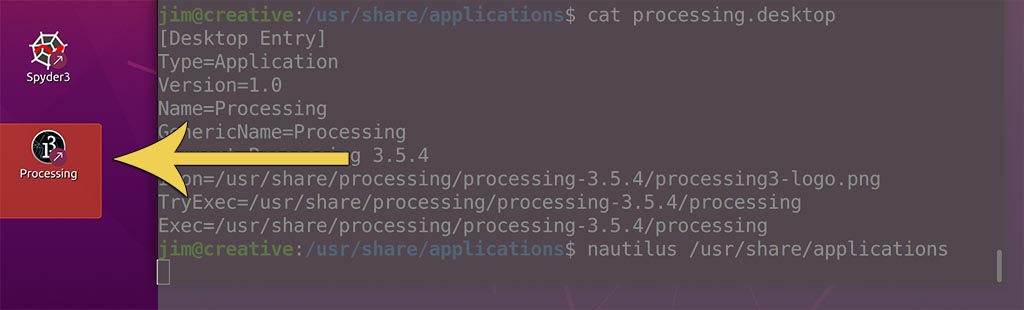
Step 08: With your mouse, right click the processing.desktop file icon and from the menu (which is shown in Figure 8 above) click the Allow Launching option. The file icon and file name should be replaced with the Processing icon and our application name: Processing. We have now created a desktop launcher.
Step 09: To verify that everything has been done correctly, double click the Processing launcher. If everything has worked, Processing will be started.
Congratulations. Unless you encountered some unforeseen glitch, you have successfully installed Processing and a desktop app launcher for starting Processing. You are now ready to get down to doing some creative coding with Processing.
If for some reason Processing itself is not working on your system, you may want to seek an answer over in the Processing forums although there is no forum specifically for Linux issues.
If the desktop launcher fails to work, you should seek help in the Ubuntu Forums at ubuntuforums.org.